|
|
 |
|
|
GWR Route: Alcester to Hatton Junction
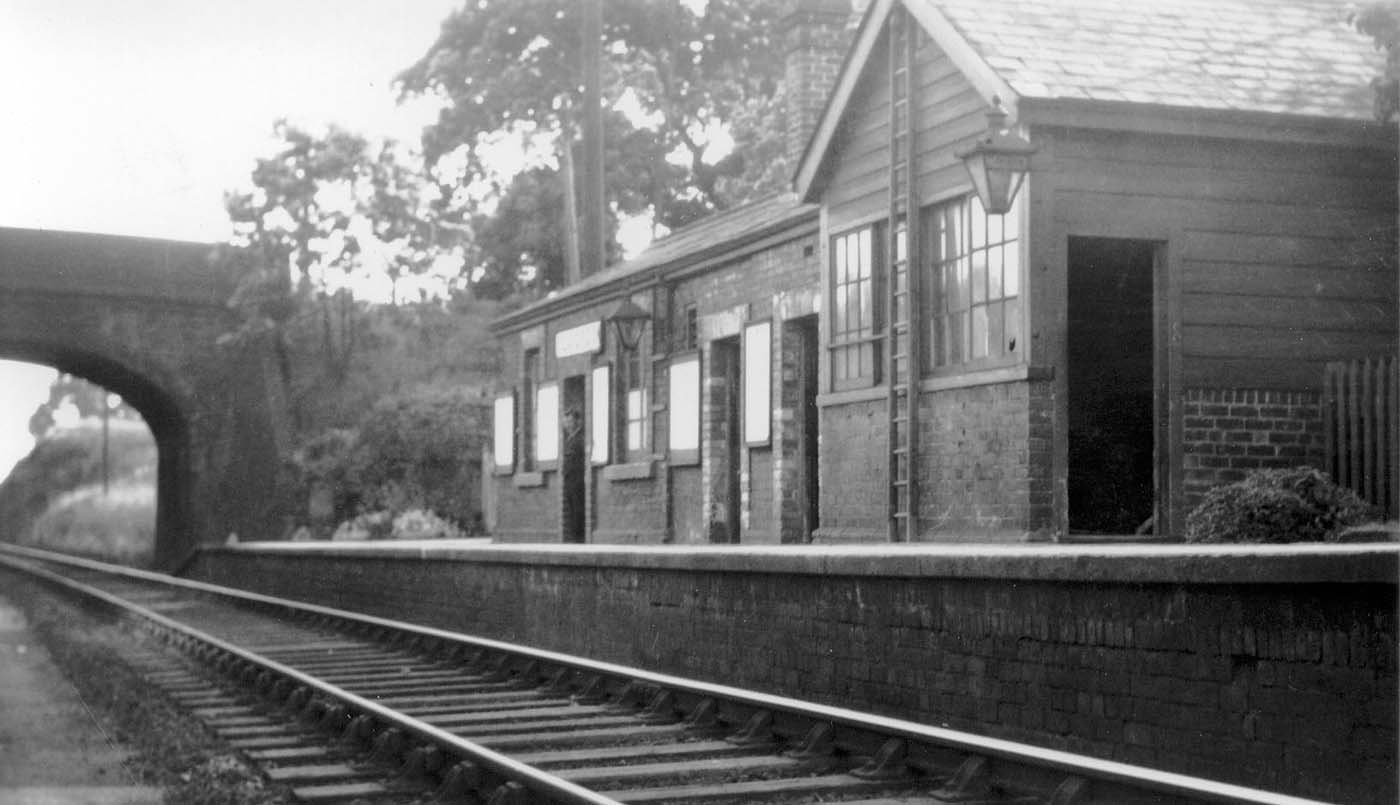
Claverdon Station: gwrc11
In this track level photograph of the station, the bricked
up apertures in the platform facing wall indicate where the point and signal
rodding originated when the platform signal box controlled the siding points
between 1891 and 1906. The Hatton to Bearley line had a Red route rating and in
this 1930’s photograph, 95lb per yard bullhead rail can be seen on
standard GWR chairs bolted through the 8’6” sleepers. The theoretical
practice of alternating the wooden keys on bi-directional lines does not seem
to be followed here. Looking to Bearley through the road bridge the other
abutment of the west occupation bridge can be seen. Note the ladder placed
flush to the near gable wall under the eaves of what used to be the platform
signal box. Its use is not obvious to any of the contributors.
Robert Ferris
 back back
|
|
|