·  LMS  ·  GWR  ·  LNER  ·  Misc  ·  Stations  ·  What's New  ·  Video  ·  Guestbook  ·  About

Moor Street Passenger Station

GWR Route: Banbury to Wolverhampton

GWR Route: North Warwickshire Line

Moor Street station was opened in July 1909 but the station known today, complete with the now demolished goods shed, was opened on 7th January 1914. Moor Street was opened as a measure to reduce the traffic through Snow Hill tunnel and consequently was designed to handle local commuter traffic originating from Leamington and the North Warwickshire line. In addition to this traffic, Moor Street had extensive goods facilities which again handled traffic that would have had to pass through Snow Hill tunnel to Hockley. Being a terminus station and built in a confined area, Moor Street possessed two traversers, one for each pair of tracks. These allowed the locomotives to move sideways instead of reversing back through crossovers. This space saving device was finally removed in 1967 when a crossover was installed. The Signal Box controlling the junction and part of the section to Bordesley was first opened in 1909 and had 118 levers. It closed on the 1st September 1969 as part of the upgrade to signalling in the area when Saltley Power Box becoming operational. The extensive goods facilities included an upper and lower area as the steep terrain allowed the goods shed to be built on two levels. Access to the lower area was via the lines from the south. Goods traffic finally ceased in 6th November 1972.

Much of the information on this and other webpages of Warwickshire Railways is derived from articles or books listed in our 'bibliography'.

Moor Street Passenger Station (66) Moor Street Goods Station (41)
GWR Article - Operating Moor Street Station GWR Article - Electrical Labour-Saving Equipment
GWR Article - New Wagons for Banana Traffic GWR Article - New Coaches for Suburban Services
GWR Article - Traversing Tables GWR Article - District Inspector
GWR Service Time Table - Instructions Engine Whistle Codes

Moor Street Station - The beginning

One of the many buildings demolished in the early part of the twentieth century to make way for Moor Street station
Ref: gwrms1104
NRM
One of the many buildings demolished in the early part of the 20th century to make way for Moor Street station
Another view of Moor Street station's subterranean goods shed and facilities comprising wooden staging between columns
Ref: gwrms1324
GWR Magazine
Looking to Bordesley showing the Snow Hill to Paddington line on the left and the low level Goods Sheds
In July 1909 the Great Western Railway purchased from Birmingham Council the Old Public Offices for £15,250
Ref: gwrms1714
Great Western Railway
In July 1909 the Great Western Railway purchased from Birmingham Council the Old Public Offices for £15,250
Another May 1913 view across the new Shed A construction site to the passenger station and the future top level goods shed
Ref: gwrms1704
Great Western Railway
Another May 1913 view across the new Shed A construction site to the passenger station and the top level goods shed
Close-up of Moor Street passenger terminus station, a steam rail-motor and trailer is seen waiting at the platform
Ref: gwrms1704a
Great Western Railway
Close-up of Moor Street passenger terminus station, a steam rail-motor and trailer is seen waiting at the platform

Erection of the steel framework and braced roof trusses of the four hundred foot long top level shed nears completion
Ref: gwrms1705
Great Western Railway
Erection of the steel framework and roof trusses of the four hundred foot long top level shed nears completion
The high level shed steelwork frame was covered in cladding to provide weather protection for the goods being transhiped
Ref: gwrms1713
Great Western Railway
The high level shed steelwork frame was covered in cladding to provide weather protection for goods being transhiped
Close-up showing a train of Midland Railway open wagons delivering materials for the contractors
Ref: gwrms1713a
Great Western Railway
Close-up showing a train of Midland Railway open wagons delivering materials for the contractors
Moor Street station and the high level goods shed with a suburban passenger train leaving the bay platform No1
Ref: gwrms1706
Great Western Railway
Moor Street station and the high level goods shed with a suburban passenger train leaving the bay platform No1
Close-up of the end of the island platform where a GWR water crane was available to replenish locomotives
Ref: gwrms1706a
Great Western Railway
Close-up of the end of the island platform where a GWR water crane was available to replenish locomotives

The high level goods shed nearing completion in December 1913 and was four hundred feet long with two bays
Ref: gwrms1708
Great Western Railway
The high level goods shed nears completion in December 1913 and was four hundred feet long with two bays
One of the two traverser tables at the north end of the 700 foot long single island platform at Moor Street Station in 1910
Ref: gwrms1697
GWR Magazine
One of two traverser tables at the north end of the 700 foot long single island platform at Moor Street Station in 1910
One of the station's traverser tables undergoing a weight test with two GWR 2-4-2T 36XX class locomotives
Ref: gwrms1699
GWR Magazine
One of the station's traverser tables undergoing a weight test with two GWR 2-4-2T 36XX class locomotives
A view of Moor Street in May 1915 with the passenger terminus station dominated by the completed high level shed
Ref: gwrms1710
Great Western Railway
View of Moor Street in May 1915 with the passenger terminus station dominated by the high level shed
A 1914 view of the passenger terminus at Moor Street with a local suburban train adjacent to the traverser table
Ref: gwrms1710a
Great Western Railway
A 1914 view of the passenger terminus at Moor Street with a local suburban train adjacent to the traverser table

On a wet June day in 1911 a Steam Railcar waits at the island platform at Moor Street Station
Ref: gwrms1701
Great Western Railway
On a wet June day in 1911 a Steam Railcar waits at the island platform at Moor Street Station
A view of the completed terminus building and the bay at the end of platform 2 with its traversing table in 1914
Ref: gwrms1711
Great Western Railway
A view of the completed terminus building and the bay at the end of platform 2 with its traversing table in 1914
In 1930, the GWR requested parliamentary powers for the compulsory closure of the footpath adjacent to the main line viaduct
Ref: gwrms1732
GWR
The GWR requesting powers for the compulsory closure of the footpath adjacent to the main line viaduct

External views of Moor Street

View along Moor Street as one of Birmingham's Trams passes the front of Moor Street station prior to their withdrawal
Ref: gwrms2727
B Geens
View along Moor Street as one of Birmingham's Trams passes the front of Moor Street station
The front facade of Moor Street passenger station showing the roof made up of five-vaulted glass canopies
Ref: gwrms2726
B Geens
The front facade of Moor Street passenger station showing the roof made up of five-vaulted glass canopies
Exterior view of Moor Street station showing the main passenger entrance which led to the large spacious booking hall
Ref: gwrms251
LGRP
Exterior of Moor Street station showing the main passenger entrance which led to the large spacious booking hall
Another view of Moor Street being rebuilt as a Ring Road with the station and goods yard on the right
Ref: gwrms2730
P Nicklin
Another view of Moor Street being rebuilt as a Ring Road with the station and goods yard on the right
A long distance view of Moor Street passenger station and goods station during the building of ring road in the 1960s
Ref: gwrms2759
RS Carpenter
A long distance view of Moor Street passenger station and goods station during the building of ring road

View of the upper level goods facilities at Moor Street seen during demolition work of adjacent buildings
Ref: gwrms2761
RS Carpenter
View of the upper level goods facilities at Moor Street seen during demolition work of adjacent buildings

Moor Street Station - Operating the Traversers

Carman H Farley from Moor Street after wining the ‘Floyd Cup’ at the annual GWR Horse parade in Birmingham
Ref: gwrms1735
Great Western Magazine
GWR 4-4-2T No 4600 being transferred to the loop line from the line serving island platform No 3
Ex-GWR 2-6-2T 'Prairie' No 6152 is seen standing on the traverser as it is being moved from platform 2 to platform 1 on the right
Ref: gwrms1223
HMRS
Ex-GWR 2-6-2T 'Prairie' No 6152 stands on the traverser as it moves from platform 2 to platform 1 on the right
Close up of the warning signal on Moor Street's traverser which prevents a local accidentally derailing
Ref: gwrms2744
Anon
Close up of the warning signal on Moor Street's traverser which prevents a local accidentally derailing
Part of the traverser between Platforms 1 and 2 has been lifted and laid out on the track behind
Ref: gwrms2725
Great Western Railway
Part of the traverser between Platforms 1 and 2 has been lifted and laid out on the track behind
Cross section through the traverser table, showing how one of the three rail roads could be moved sideways
Ref: gwrms1698
GWR Magazine
Cross section through the traverser table, showing how one of the three rail roads could be moved sideways

Moor Street Station - Passenger operations

View of the concourse area leading to the platforms at Moor Street station showing the ground level goods yard to the right of the release road for locomotives
Ref: gwrms1206
GWR Magazine
View of the concourse area leading to the platforms at Moor Street station showing the ground level goods yard
Close up showing one of the first GWR women ticket collectors appointed early in the First World War
Ref: gwrms1206a
GWR Magazine
Close up showing one of the first GWR women ticket collectors appointed early in the First World War
View of Moor Street station's concourse and the booking office windows and general waiting room located in the building adjacent to Moor Street
Ref: gwrms1225
CR Clinker
The station's concourse, booking office windows and general waiting room located adjacent to Moor Street
An official photograph of Moor Street Station concourse showing detail of the roof as seen in May 1915
Ref: gwrms1709
Great Western Railway
An official photograph of Moor Street Station concourse showing detail of the roof as seen in May 1915
Close up of the two booking office counter positions and too the right the Station Master standing outside his office door
Ref: gwrms1709a
Great Western Railway
Close up of the two booking office counter positions with the Station Master standing outside his office door

Close-up of the northern corner of the concourse where the General waiting room and the Ladies waiting room were situated
Ref: gwrms1709b
Great Western Railway
Close-up of the corner of the concourse where the General waiting room and the Ladies waiting room were situated
Ex-GWR 2-6-2T 'Large Prairie' No 5181 is seen standing at Platform 2 whilst the head of a local passenger service prior to moving forward on to the traverser
Ref: gwrms1224
Stations UK
Ex-GWR 2-6-2T 'Large Prairie' No 5181 is seen standing at Platform 2 whilst the head of a local passenger service
View along one of Moor Street's platforms towards to the main terminus building with the 400 foot upper goods shed on the left
Ref: gwrms254
Lens of Sutton
View along one of Moor Street's platforms towards to the main building with the goods shed on the left
View along Moor Streets platforms towards the City centre with the GWR large water tower on the right adjacent to the main line
Ref: gwrms255
HC Casserley
Looking along Moor Street's platforms towards the City centre with the GWR large water tower on the right
Looking towards Tyseley with the upper goods shed on the right and the main Snow Hill to Leamington lines on the left behind the carriages
Ref: gwrms253
Lens of Sutton
Looking towards Tyseley with the upper goods shed on the right and the main Snow Hill to London lines on the left

Winter 1968, looking south from the island platform along the viaduct towards Bordesley
Ref: gwrms1731
P Chancellor
Winter 1968, looking south from Moor Street station's island platform along the viaduct towards Bordesley
Close to the rear of Moor Street signal box at the end of the island platform, British Railways installed a replacement steel tubular signal post
Ref: gwrms1728
R Pixton
Close to the rear of Moor Street signal box, BR installed a replacement steel tubular signal post
Close up giving another view of the buffer stops at the end of Moor Street platforms and the terminus building
Ref: gwrms255a
HC Casserley
Close up giving another view of the buffer stops at the end of Moor Street platforms and the terminus building
View of Moor Street station with an unknown GWR 2-6-2T 'Prairie' tank running bunker first at the head of a local passenger service
Ref: gwrms1096
Lens of Sutton
Moor Street station with an unknown GWR 2-6-2T 'Prairie' tank running bunker first at the head of a local service
Close up view of the terminus end of the platform showing three miscellaneous vehicles standing next to the traverser
Ref: gwrms254a
Lens of Sutton
Close up view of the terminus end of the platform showing three miscellaneous vehicles standing next to the traverser

A group of morning commuters are seen going through Moor Street's ticket barrier on 30th April 1969
Ref: gwrms2731
Great Western Railway
A group of morning commuters are seen going through Moor Street's ticket barrier on 30th April 1969
School children evacuated from Platform 3 of Moor Street station on 1st and 2nd September 1939
Ref: gwrms2654
Birmingham Post & Mail
Birmingham school children evacuated from Platform 3 of Moor Street station on 1st and 2nd September 1939
Territorials from the Royal Warwickshire Regiment board GWR coaches assembled to form a troop train
Ref: gwrms2655
Birmingham Post & Mail
Territorials from the Royal Warwickshire Regiment board GWR coaches assembled to form a troop train
Looking along Platform 2 towards the traverser with Platform 1 and Moor Street warehouse  on right
Ref: gwrms2729
RG Nelson
Looking along Platform 2 towards the traverser with Platform 1 and Moor Street warehouse on right
Looking north towards Moor Street station with the lifted track bed to Snow Hill tunnel on the right
Ref: gwrms2757
D Chandler
Looking north towards Moor Street station with the lifted track bed to Snow Hill tunnel on the right

View from the Bordesley side of Moor Street Signal Box showing the deep windows at the rear of the signal box
Ref: gwrms2748
A Ross
View from the Bordesley side of Moor Street Signal Box showing the deep windows at the rear of the signal box
Signalman Cecil Kendrick, seen on the left, and two colleagues inside Moor Street Signal Box
Ref: gwrms2749
D Kendrick
Signalman Cecil Kendrick, seen on the left, and two colleagues inside Moor Street Signal Box
An official photograph appeared in the GWR Magazine of June 1911, depicting the new four coach sets
Ref: gwrms1730
GWR Magazine
Official photographs depicting the new four coach sets which appeared in the GWR Magazine of June 1911,
Composite view of the seven new four coach suburban sets introduced in to the Birmingham division in 1924
Ref: gwrms1787
GWR & JH Russell
Composite view of the seven new four coach suburban sets introduced in to the Birmingham division in 1924
Carman H Farley from Moor Street after wining the ‘Floyd Cup’ at the annual GWR Horse parade in Birmingham
Ref: gwrms1733
Great Western Magazine
Carman H Farley from Moor Street after wining the ‘Floyd Cup’ at the annual GWR Horse parade in Birmingham

A Birmingham Mail article describing the appointment by the GWR of two lady ticket collectors in World War One
Ref: gwrms2746
Birmingham Mail
A Birmingham Mail article describing the appointment by the GWR of two lady ticket collectors in World War One
In 1927, the GWR changed the signal arms and coloured spectacle lens associated with Distant Signals in the Birmingham Area
Ref: gwrms1801
GWR
In 1927, the GWR changed the signal arms and coloured spectacle lens associated with Distant Signals
A schematic of the Signalling Diagram to Moor Street Signal Box which controlled the lines to the north and the south
Ref: gwrms2747
Signal Record Society
A schematic of the Signalling Diagram to Moor Street Signal Box which controlled the lines to the north and the south
The first wounded soldiers arrive in Birmingham on 1st September 1914 for treatment and convalescence
Ref: gwrms3880
Birmingham Post & Mail
The first wounded soldiers arrive in Birmingham on 1st September 1914 for treatment and convalescence

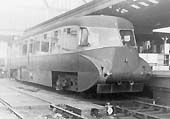
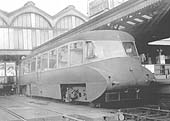
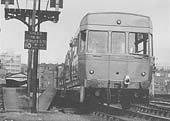
Trains seen at or near Moor Street

Ex-GWR 2-6-2T No 6373 is seen at the head of the 3.10pm local passenger working to Henley in Arden on 6th June 1957
Ref: gwrms1101
R Darlaston
Ex-GWR 2-6-2T No 6373 is seen at the head of the 3.10pm local passenger working to Henley in Arden
Ex-GWR 4-6-0 No 6014 'King Henry VII' is seen on a down express service as it passes the junction of Moor Street station
Ref: gwrms1100
RS Carpenter
Ex-GWR 4-6-0 No 6014 'King Henry VII' on a down express service as it passes the junction of Moor Street station
Ex-GWR 2-6-0 No 6340 is seen at the head of a parcels train as it passess from the down relief life line on to the down main line
Ref: gwrms1097
RS Carpenter
Ex-GWR 2-6-0 No 6340 at the head of a parcels train as it passess from the down relief line to the down main line
Ex-GWR 4-6-0 No 5996 'Mytton Hall' is seen emerging from Snow Hill tunnel on the 5.45pm Snow Hill to Worcester via Stratford upon Avon express
Ref: gwrms1099
M Mensing
Ex-GWR 4-6-0 No 5996 'Mytton Hall' is seen emerging from Snow Hill tunnel on the 5.45pm Snow Hill to Worcester
Ex-GWR 0-6-2T No 6668 departs the traverser having brought the 6 25 pm local from Knowle & Dorridge
Ref: gwrms1227
M Mensing
Ex-GWR 0-6-2T No 6668 departs the traverser having brought the 6 25 pm local from Knowle & Dorridge

Ex-GWR 4-6-0 King class No 6026 'King John' is seen at the head of the up Cambrian Express as it leaves Snow Hill tunnel by Moor Street station in 1959
Ref: gwrbsh1316
Colour Rail
Ex-GWR 4-6-0 King class No 6026 'King John' at the head of the up Cambrian Express as it leaves Snow Hill tunnel
A grimy GWR designed 2-6-2T large prairie No 4161 of the 51XX class on a three coach suburban passenger train
Ref: gwrms1718
Anon
A grimy GWR designed 2-6-2T large prairie No 4161 of the 51XX class on a three coach suburban passenger train
Ex-GWR 0-6-0PT 57xx class No 3625 is seen on a class K freight as it passes Moor Street station as it is about to enter the tunnel to Snow Hill station
Ref: gwrms1222
BWL Brooksbank
Ex-GWR 0-6-0PT No 3625 on a class K freight as it passes Moor Street as it is about to enter the tunnel to Snow Hill
Three Great Western Railway designed locomotives running light past Moor Street Station on the down main to Snow Hill
Ref: gwrms1719
M Mensing
Three Great Western Railway designed locomotives running light past Moor Street Station on the down main to Snow Hill
Ex-Great Western Railway large prairie 2-6-2T 81xx class No. 8109 on the central railroad of the traversing table
Ref: gwrms1727
R Pixton
Ex-Great Western Railway large prairie 2-6-2T 81xx class No. 8109 on the central railroad of the traversing table

A typical 1920’s scene with an unidentified GWR 0-4-2T class 517 tank locomotive with two auto-trailer coaches in platform 3
Ref: gwrms1721
GWR Magazine
A typical 1920’s scene with a GWR 0-4-2T class 517 tank locomotive with two auto-trailer coaches
In 1927, the GWR changed the signal arms and coloured spectacle lens associated with Distant Signals in the Birmingham Area
Ref: gwrms2536
HMRS AET933-1
Ex-LMS 2-6-2T 3P No 40002 passes the approaches to Moor Street whilst on a down local service to Snow Hill
Ex-GWR 4-6-0 60xx class No 6026 ‘King John’ on the down Cambrian Coast Express crossing the bridge over the New Street approach tracks and about to enter Snow Hill tunnel
Ref: gwrms2614
C Walker
BR 2-6-2T 5101 class No 4171 leaves Snow Hill tunnel on the up main line with Moor Street Station on the left
Ex-GWR 4-6-0 60xx class No 6026 ‘King John’ on the down Cambrian Coast Express crossing the bridge over the New Street approach tracks and about to enter Snow Hill tunnel
Ref: gwrms2543
C Walker
Ex-GWR 4-6-0 No 6026 'King John' on the down Cambrian Coast Express about to enter Snow Hill tunnel
Ex-GWR 4-6-0 No 6013 'King Henry VIII' drifts slowly past Moor Street and Bordesley North's distant signal
Ref: gwrms2751
JC Flemons
Ex-GWR 4-6-0 No 6013 'King Henry VIII' drifts slowly past Moor Street and Bordesley North's distant signal

Ex-GWR 4-6-0 No 5946 'Marwell Hall' stands at Platform 3 after arriving with the 9:10am Kingswear to Moor Street service
Ref: gwrms2750
M Mensing
Ex-GWR 4-6-0 No 5946 'Marwell Hall' stands at Platform 3 with the Kingswear to Moor Street service
Another view of ex-GWR 4-6-0 No 5946 'Marwell Hall' as it reverses back off Platform 3's traverser
Ref: gwrms2738
CC Green
Another view of ex-GWR 4-6-0 No 5946 'Marwell Hall' as it reverses back off Platform 3's traverser
Ex-GWR 4-6-0 No 5065 'Newport Castle' arrives with the 1:11pm from Portsmouth Harbour on 2nd July 1960
Ref: gwrms2753
M Mensing
Ex-GWR 4-6-0 No 5065 'Newport Castle' arrives with the 1:11pm from Portsmouth Harbour on 2nd July 1960
Ex-GWR 0-6-0PT No 9798 is seen crossing slowly from the down relief line to the down main line
Ref: gwrms2754
M Mensing
Ex-GWR 0-6-0PT No 9798 is seen crossing slowly from the down relief line to the down main line
Ex-GWR 4-6-0 No 7029 'Clun Castle' is seen working an enthusiasts special, 'The Zulu' on 4th March 1967
Ref: gwrms2760
KRM
Ex-GWR 4-6-0 No 7029 'Clun Castle' is seen working an enthusiasts special, 'The Zulu' on 4th March 1967

British Railways 4-6-0 class No 7021 ‘Haverfordwest Castle’ crosses from the down relief to the down main line
Ref: gwrms3884
C Walker
British Railways 4-6-0 class No 7021 ‘Haverfordwest Castle’ crosses from the down relief to the down main line
Caledonian Railway 4-2-2 (Single) No 123 on display at Moor Street Station on 13th April 1960
Ref: gwrms3885
M Mensing
Caledonian Railway 4-2-2 'Single' No 123 on display at Moor Street Station on 13th April 1960

Diesel Dawn

In 1927, the GWR changed the signal arms and coloured spectacle lens associated with Distant Signals in the Birmingham Area
Ref: gwrms2537
HMRS AES117
Ex GWR Diesel Railcar No7 on the traverser at the end of Platform 3 at Moor Street on 23rd September 1950
Ex-GWR Diesel Railcar No 7 stands at Platform 3 with a special working to the Forest of Dean on 23rd September 1950
Ref: gwrms2752
AW Croughton
Another view od ex-GWR Diesel Railcar No 7 standing at Platform 3 with a special working to the Forest of Dean
View of a three-car, four wheel ACV Lightweight Diesel Unit standing at Moor Street's Platform 1 with a local service
Ref: gwrms2755
V Michel
View of a three-car, four wheel ACV Lightweight Diesel Unit standing at Moor Street's Platform 1 with a local service
Three-car Diesel Multiple Unit with W50077 leading on the local 1.35pm Moor Street to Stratford upon Avon service on 27th February 1960
Ref: gwrms1102
M Mensing
Three-car Diesel Multiple Unit with W50077 leading on the local 1.35pm Moor Street to Stratford upon Avon service
DMU W55004 is seen standing at Moor Street station is seen after it had been detached from the 1.30pm train from Leamington Spa
Ref: gwrms1103
M Mensing
DMU W55004 stands at Moor Street station is seen after it had been detached from the 1.30pm Leamington Spa

The three-car prototype ACV lightweight diesel railcar set stands at Moor Street on a local commuter service
Ref: gwrms3223
EA Wood
The three-car prototype ACV lightweight diesel railcar set stands at Moor Street on a local commuter service

Maps and schematic drawings of Moor Street Station

An October 1895 Fire Insurance map showing the Birmingham City end of the Bordesley Viaduct
Ref: gwrms2722
Birmingham Library
An October 1895 Fire Insurance map showing the Birmingham City end of the Bordesley Viaduct
Cross sectional view of Moor Street station showing the passenger station on the left, the upper goods yard on the right and the two lower sheds
Ref: gwrms1204
GWR Magazine
Cross sectional view of the station showing the passenger station, the upper goods yard and the two lower sheds
Site plan showing the two lower sheds in relation to the main line to Snow Hill and Park Street and Allison Street which provided access to both sheds
Ref: gwrms1205
GWR Magazine
Site plan showing the two lower sheds in relation to the main line to Snow Hill and Park Street and Allison Street
An undated schematic diagram showing the approach and the layout of Moor Street station
Ref: gwrms2724
Anon
An undated schematic diagram showing the approach and the layout of Moor Street station
Map of Moor Street station surveyed during construction works in 1914 before the station and track layout was completed
Ref: moor_st_map

Map of Moor Street station during construction works in 1914 before the station and track layout was completed

Photographs of Moor Street Station (65) Photographs of Moor Street Goods Depot (39)
GWR Article - Operating Moor Street Station GWR Article - Electrical Labour-Saving Equipment
GWR Article - New Wagons for Banana Traffic GWR Article - New Coaches for Suburban Services
GWR Article - Traversing Tables GWR Article - District Inspector
GWR Service Time Table - Instructions Engine Whistle Codes